Thinking about making the United States your permanent home? Getting a Green Card, or Permanent Resident Card, is the way to do it. It lets you live and work here for good. But honestly, figuring out how to get one can feel like a puzzle. There are different ways to apply, and each has its own set of rules. This guide is here to break down the process of how to obtain permanent residency USA in 2026, making it a bit less confusing. We’ll cover what you need to know to start your journey.
Key Takeaways
A Green Card allows you to live and work permanently in the U.S. and is the first step towards potential citizenship.
Eligibility for a Green Card is typically based on family ties, employment, humanitarian reasons, or other special programs.
The application process involves either adjusting your status within the U.S. or going through consular processing abroad.
Holding a Green Card comes with specific rights, such as the ability to work freely, and responsibilities, like maintaining your residency and reporting address changes.
Understanding processing times is important, as they can vary greatly depending on your application category and current USCIS workloads.
Understanding The Green Card For Permanent Residency
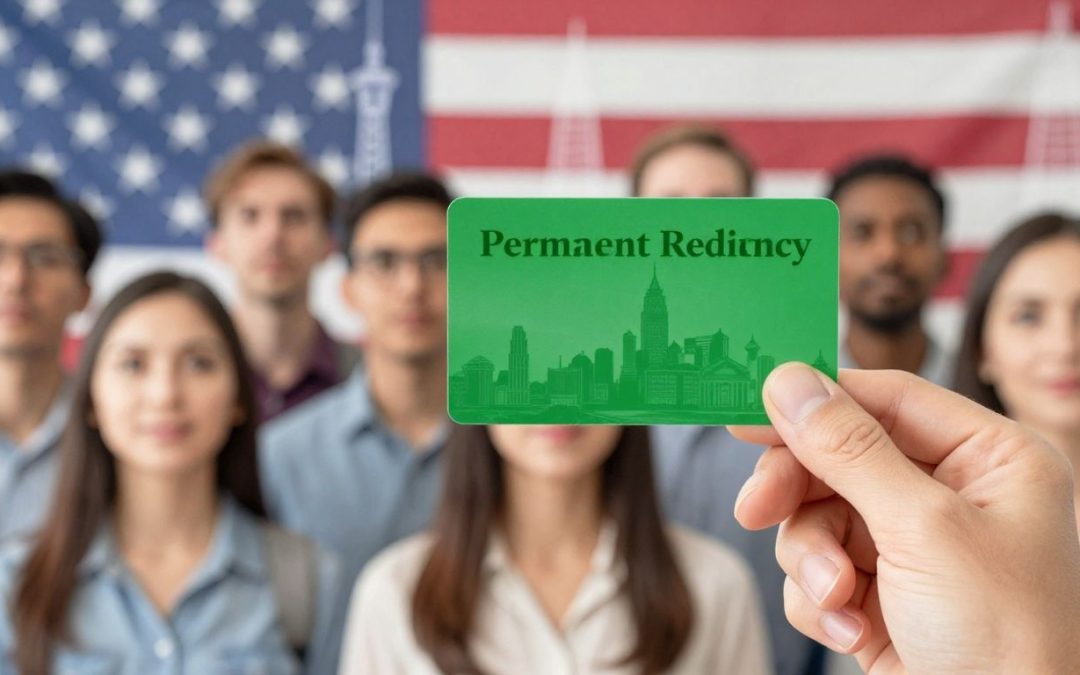
So, you’re thinking about making the US your permanent home, huh? That’s a big step, and the key to that is the Green Card. Officially, it’s called the Permanent Resident Card, and it’s basically your ticket to living and working in the United States indefinitely. It got its name way back when because the card was actually green, though it’s changed colors since then. Today, it’s a card with your photo, fingerprints, and all your important identification details.
What Is A Green Card?
A Green Card is more than just a piece of plastic; it’s official proof that you have the legal right to live and work permanently anywhere in the United States. Think of it as your official status as a Legal Permanent Resident (LPR). It’s the goal for many people who come to the US, offering a sense of stability and a pathway to a new life.
How Does A Green Card Function?
Functionally, a Green Card allows you to stay in the US forever, as long as you follow the rules. It means you’re not tied to a specific employer or a temporary visa. You can change jobs, move across the country, and generally live your life much like a US citizen, with a few key differences. It’s the foundation for building a life here.
Benefits Of Holding A Green Card
Why do people want one so badly? Well, the benefits are pretty significant. For starters, you get a lot more freedom in the job market. You can switch jobs without needing a new sponsor, which opens up way more career opportunities. Plus, you can live anywhere in the US. It also puts you on the path to eventually becoming a US citizen through naturalization, usually after five years of holding the card (or three years if you’re married to a US citizen). Beyond work and citizenship, Green Card holders can often qualify for social benefits, like certain health programs, and can even petition for close family members to immigrate too. It really opens up a lot of doors.
The Green Card signifies a major life change, offering security and opportunity. It’s the first step for many towards integrating fully into American society and pursuing their long-term goals.
Here’s a quick look at some of the main perks:
Employment Flexibility: Work for almost any employer, start your own business, or change careers without needing new visa sponsorship.
Freedom of Movement: Live in any state or territory within the United States.
Path to Citizenship: Become eligible to apply for US citizenship after a set period.
Family Reunification: Sponsor certain close family members (spouse, unmarried children) to get their own Green Cards.
Access to Benefits: Potentially qualify for social security, Medicare, and other government-backed programs after meeting certain requirements.
Eligibility Requirements For Permanent Residency
Determining Your Eligibility To Apply
So, you’re thinking about getting a Green Card. That’s a big step! Before you even start filling out forms, the most important thing is figuring out if you actually qualify. The U.S. immigration system has a bunch of different ways people can become permanent residents, and each one has its own set of rules. It’s not a one-size-fits-all situation, you know?
Basically, you need to fall into one of the categories that the government has set up. These usually fall into a few main buckets: family ties, employment, humanitarian reasons, or special programs. For example, if you have a close family member who is a U.S. citizen or a Green Card holder, that might be your path. Or, if you have a job offer from a U.S. employer who is willing to sponsor you, that’s another route. There are also options for refugees, asylum seekers, and people with unique circumstances.
It’s really important to look at the specific requirements for each category. What works for one person might not work for another. You’ll want to check out the official USCIS website or talk to an immigration lawyer to get a clear picture of where you fit in. The key is to find the right category that matches your situation.
Sponsorship For A Permanent Resident Card
For most people wanting a Green Card, someone else needs to start the process for them. This person or entity is usually called the sponsor or petitioner. Think of them as the one vouching for you to the U.S. government. In many cases, this is a family member, like a spouse, parent, or adult child who is already a U.S. citizen or a permanent resident. For employment-based Green Cards, it’s typically the U.S. employer who wants to hire you permanently.
However, there are situations where you can petition for yourself, which is called ‘self-petitioning.’ This often applies in cases of abuse or extreme hardship, like certain VAWA (Violence Against Women Act) cases or for investors starting businesses in the U.S.
Here are some common scenarios and who usually files the initial petition:
Family-Based: A U.S. citizen or Green Card holder files Form I-130, Petition for Alien Relative.
Employment-Based: A U.S. employer files Form I-140, Immigrant Petition for Alien Worker.
Special Immigrants: This can include various groups, like religious workers or certain broadcasters, who might use different forms like Form I-360, Petition for Amerasian, Widow(er), or Special Immigrant.
Victims of Crime/Trafficking: Individuals who have suffered certain crimes or trafficking might be eligible to self-petition using forms like I-918, Petition for U Nonimmigrant Status.
It’s not just about having a sponsor; the sponsor also has to meet certain financial requirements to show they can support you and that you won’t become a public charge. This usually involves submitting an Affidavit of Support.
Commonly Used Immigrant Petitions
When you’re applying for a Green Card, the first major hurdle is often getting an immigrant petition approved. This is the document that establishes your eligibility based on your relationship to a U.S. citizen/resident or your employment situation. The specific form you’ll use depends entirely on why you’re applying.
Here are some of the most frequent petitions you’ll encounter:
Form I-130, Petition for Alien Relative: This is the go-to form if you’re applying based on a family relationship. A U.S. citizen or Green Card holder files this to petition for a spouse, child, parent, or sibling.
Form I-140, Immigrant Petition for Alien Worker: This is used for employment-based immigration. A U.S. employer files this on behalf of a foreign worker they wish to hire permanently. There are different subcategories within this petition based on the worker’s skills and qualifications.
Form I-360, Petition for Amerasian, Widow(er), or Special Immigrant: This is a bit of a catch-all for specific groups, including certain veterans, religious workers, and individuals applying under the Violence Against Women Act (VAWA).
Form I-526, Immigrant Petition by Alien Entrepreneur: This is for the EB-5 Immigrant Investor Program. Foreign investors file this to show they are making a significant investment in a U.S. business that will create jobs.
There are other petitions too, like those for refugees and asylum seekers (Form I-730) or victims of certain crimes (Form I-918), but the ones listed above cover a huge chunk of Green Card applications. Getting this petition right is super important because it’s the foundation for your entire Green Card application.
Navigating The Application Process
So, you’ve figured out you’re eligible for a green card and someone’s willing to sponsor you, or maybe you can sponsor yourself. That’s awesome! But now comes the part where you actually have to, you know, apply. It can seem like a lot, but it basically boils down to two main paths: either you adjust your status while you’re already here in the U.S., or you go through what’s called consular processing if you’re outside the country.
Adjustment of Status Within the U.S.
This is for folks who are already in the United States legally and want to change their immigration status to permanent resident without having to leave. Think of it as switching gears while staying on the same road. You’ll likely be filing Form I-485, Application to Register Permanent Residence or Adjust Status. It’s a big form, and you’ll need to include a bunch of supporting documents. This path usually involves a biometrics appointment for fingerprints and photos, and often, an interview with a USCIS officer.
Consular Processing Outside the U.S.
If you’re living abroad, or if you’re in the U.S. but not eligible to adjust your status here, you’ll go through consular processing. This means you’ll work with the National Visa Center (NVC) and then attend an interview at a U.S. embassy or consulate in your home country. They’ll review your case, and if everything checks out, they’ll issue you an immigrant visa. Once you get that visa, you can travel to the U.S. as a lawful permanent resident.
General Application Steps
No matter which path you take, there’s a general flow to things. It’s not always super straightforward, and sometimes there are waiting periods, especially if you have to wait for a visa number to become available based on your category. Here’s a simplified look at the common stages:
Petition Filing: Usually, a sponsor (like a family member or employer) files an immigrant petition (like Form I-130 or I-140) with USCIS. Sometimes, you can file this yourself.
Visa Availability Check: For many categories, you have to wait until your priority date is current. The State Department publishes a Visa Bulletin each month showing when this happens. Immediate relatives of U.S. citizens usually don’t have to wait for this.
Application Submission: Once a visa is available (or if you don’t need to wait), you’ll file your main green card application (Form I-485 if in the U.S., or start the consular process abroad).
Supporting Appointments: This typically includes a biometrics appointment for your fingerprints and photos, and potentially an interview.
Decision and Arrival: After your interview and review, USCIS or the consulate will make a decision. If approved, you’ll either get your green card mailed to you (if adjusting status) or be able to travel to the U.S. with your immigrant visa.
It’s really important to pay close attention to all the details in your application. Missing information or making mistakes can cause delays or even lead to your application being denied. Double-checking everything and making sure you have all the required documents before you submit is a really good idea.
Keep in mind that these are general steps. Your specific situation might have a few extra twists and turns. It’s always best to check the official USCIS website or consult with an immigration professional if you’re unsure about any part of the process.
Key Steps In The Application Journey
Once you’re set on applying for a Green Card, there are a few specific parts of the process that everyone needs to get through. Each of these stages plays a big role in finding out if you’ll be approved or not, so it helps to know what’s coming. Here’s a breakdown of the main checkpoints:
Biometrics Appointment
After you’ve submitted your application, USCIS will ask you to come in for biometrics. Basically, they want your fingerprints, photo, and signature to check your background.
You’ll get a notice in the mail with the date, time, and location.
Show up with your appointment letter and a valid photo ID (passport or driver’s license).
The appointment doesn’t take too long—usually under an hour—but it’s important not to miss it.
If you can’t make your scheduled time, you must reschedule in advance, or your application could be delayed or even denied.
The USCIS Interview
This part feels a lot like a job interview, but with paperwork. A USCIS officer will ask questions about your application, your life, and maybe your relationship if you’re applying through a family member.
Bring all the requested documents. It can help to have originals and copies.
Expect questions about your history, any criminal records, and your eligibility.
For marriage-based applications, be ready for personal questions to make sure your marriage is real.
Sometimes, the officer will let you know their decision at the end, but often, they’ll just say you’ll hear back soon.
Receiving Your Decision
USCIS will review everything and send you a decision by mail. This could take several weeks after your interview.
Here’s what might happen:
Result
What It Means
Approved
You’ll get your Green Card in the mail, usually in a few weeks.
Request for Evidence
They need more information or documents from you.
Denied
Your application wasn’t successful; they’ll explain why.
If you’re approved, you’re almost at the finish line! At this point, you can begin thinking about maintaining permanent resident status, like keeping track of your time in the U.S. (for example, physical presence rules for naturalization).
Keep your address updated with USCIS.
Don’t forget: You’ll need to renew your Green Card every 10 years.
If your application is denied, look closely at the reasons provided and consider next steps, like reapplying or speaking to an immigration attorney.
The process might seem uncertain, but most folks get through it with patience and good preparation. Each stage is a step closer to living permanently in the U.S.
Rights And Responsibilities Of Green Card Holders
So, you’ve got your Green Card – that’s awesome! It means you’re officially a Lawful Permanent Resident (LPR) of the United States. This opens up a lot of doors, but it also comes with some important things you need to know. Think of it like getting a driver’s license; you can go places, but you have to follow the rules of the road.
Rights Under U.S. Law
First off, you have rights. You are protected by U.S. laws, just like citizens. This means you have the right to live and work anywhere in the U.S. permanently. You can change jobs without needing a new sponsor, which is a huge deal compared to some other visa types. You can also apply for certain government-backed loans, like mortgages, and if you’ve worked and paid taxes, you can eventually get Social Security benefits when you retire. Plus, you can petition for certain close family members to get their own Green Cards, though they might have to wait longer than if you were a U.S. citizen.
Freedom to Live and Work: You can reside and be employed anywhere in the United States.
Job Mobility: You can change employers without requiring a new sponsorship.
Access to Benefits: You may qualify for social benefits, including healthcare programs and Social Security retirement benefits.
Family Sponsorship: You can petition for specific family members to immigrate.
Path to Citizenship: After meeting residency requirements, you can apply for U.S. citizenship through naturalization.
Responsibilities To Maintain Status
Now, about those responsibilities. Keeping your Green Card status means playing by the rules. The biggest one is letting the government know if you move. You have to tell U.S. Citizenship and Immigration Services (USCIS) within 10 days of changing your address. Seriously, don’t skip this. You also have to file U.S. taxes every year and report all your income, no matter where you earned it. It’s also really important to avoid long trips outside the U.S. because staying away too long can make it look like you’ve given up your permanent residency.
Staying too long outside the U.S. can be a problem. While there’s no exact number of days that automatically means you’ve abandoned your residency, trips longer than six months can raise questions. If you need to be away for a year or more, you should look into getting a re-entry permit before you leave.
Travel Limitations For Green Card Holders
Speaking of travel, while you can leave the U.S., there are limits. Unlike U.S. citizens who can travel freely for extended periods, your trips abroad as a Green Card holder need to be managed. Generally, it’s best to keep any single trip outside the U.S. to less than a year. If you plan to be away for a year or more, you’ll need to apply for a re-entry permit before you depart. This permit basically tells USCIS that you intend to keep your U.S. residency. Failing to do this, or taking trips that are too long without proper authorization, could lead to issues when you try to come back into the country, and in some cases, could even jeopardize your Green Card status.
Maintaining Your Permanent Resident Status
So, you’ve got your Green Card – that’s fantastic news! It means you’re officially a lawful permanent resident of the United States. But here’s the thing: while your status is permanent, the physical card itself has an expiration date. Think of it like your driver’s license; you still have the right to drive, but you need the updated card to prove it. Keeping your Green Card current is key to avoiding a whole lot of headaches down the road.
Renewing Your Green Card
Your Green Card is typically valid for 10 years. You can start the renewal process, which involves filing Form I-90, Application to Replace Permanent Resident Card, about six months before it expires. If your card has already expired, or if it’s lost, stolen, or damaged, you should file the I-90 as soon as possible. Once you file, USCIS will send you a receipt notice (Form I-797) that acts as an automatic extension for your Green Card’s validity for up to 36 months while your new card is being processed. This is super important for proving your status for work or travel.
File Form I-90: This is the main application to get a new card.
Pay the Fee: There’s a filing fee, so check the USCIS website for the current amount.
Attend Biometrics: You’ll likely need to go to an appointment to have your fingerprints and photo taken.
Wait for Your New Card: Processing times can vary, but the receipt notice helps a lot during this period.
It’s worth noting that if you have a conditional Green Card (usually valid for two years), you don’t use Form I-90. You’ll need to file Form I-751, Petition to Remove Conditions on Residence, instead.
Reporting Address Changes
This is a big one, and it’s a legal requirement. If you move, you absolutely must let U.S. Citizenship and Immigration Services (USCIS) know your new address within 10 days of moving. You can do this online through the USCIS website. Failing to report a change of address can lead to serious problems, including the denial of your Green Card application or even the termination of your permanent resident status. It sounds simple, but it’s a responsibility you can’t overlook.
Failing to update your address with USCIS is a serious matter. It can result in missed notices from the agency, potentially leading to missed deadlines or hearings, which could jeopardize your immigration status. Always keep your information current.
Avoiding Extended Absences Abroad
While having a Green Card allows you to travel outside the U.S., staying away for too long can make USCIS think you’ve abandoned your permanent resident status. Generally, if you plan to be outside the U.S. for more than a year, you should apply for a Reentry Permit before you leave. If you’re gone for less than a year, it’s usually okay, but frequent or lengthy trips can still raise questions. If you end up staying abroad for over two years, you might need to get a returning resident visa from a U.S. embassy or consulate before you can come back. It’s best to keep trips abroad relatively short to avoid any issues with maintaining your status.
Understanding Processing Times For Your Application
So, you’re wondering how long this whole green card thing is going to take? It’s a big question, and honestly, there’s no single, simple answer. Think of it like planning a road trip – the time it takes depends on where you’re starting, where you’re going, and what kind of car you’re driving. For green cards, it’s similar, with different paths and categories leading to vastly different timelines.
Factors Influencing Green Card Timelines
Several things can really affect how long you’ll be waiting. Your specific immigration category is a huge one. Are you applying as an immediate relative of a U.S. citizen? That’s usually faster than, say, applying through certain employment-based categories or other family preference categories. Your country of origin can also play a role, as some countries have longer backlogs than others. And then there’s the actual agency processing your case – USCIS (U.S. Citizenship and Immigration Services) and sometimes the Department of State.
Estimating Your Application Duration
It’s tough to give exact numbers because things change, but we can look at some general estimates. For immediate relatives of U.S. citizens, the wait might be somewhere in the ballpark of 8 to 15 months. That’s for the whole process, from start to finish, assuming everything goes smoothly.
For employment-based green cards, it’s often a longer haul. You might have to go through a PERM labor certification process, which can take over 16 months on its own. Then there’s the I-140 petition, followed by waiting for a visa number to become available. All in, these cases can easily stretch to 2 to 5 years, and sometimes even longer, especially for individuals from certain countries or in specific employment categories.
Family preference categories, other than immediate relatives, can have very long waits. We’re talking years, sometimes even a decade or more, depending on the specific relationship and country. It’s really important to check the Visa Bulletin regularly to see where the dates are for your category.
The total time for your green card application isn’t just about USCIS processing your forms. You also have to consider the "visa availability" wait time, which is like waiting for your turn in a very long line. Some people get to skip this line, like immediate relatives, but many others have to wait.
Here’s a rough idea of what to expect:
Immediate Relatives of U.S. Citizens: Generally 8-15 months.
Employment-Based (EB-2, EB-3): Often 2-5 years, but can be longer.
Family Preference Categories: Can range from several years to over a decade.
Remember, these are just estimates. The best way to get the most current information is to check the official USCIS website. They have tools that show processing times for different forms and service centers. It’s always a good idea to start your application as early as possible to account for these potential delays.
Wrapping Things Up
So, getting that green card, which is basically your ticket to living and working in the U.S. for good, is a big deal. We’ve gone over a lot of the details, from what it actually means to have one, to the different ways you might be able to get it. It’s not always a quick or simple process, and honestly, it can feel like a lot to take in. But remember, having that permanent resident status opens up a lot of doors, not just for your career but for building a life here. Plus, it’s often the first step if you’re thinking about becoming a U.S. citizen down the line. Keep all this info handy, and don’t be afraid to look for help if things get confusing. You’ve got this.
Frequently Asked Questions
What exactly is a Green Card?
A Green Card, officially known as a Permanent Resident Card, is like a special ID that lets you live and work in the United States for good. It means you’re a lawful permanent resident, not just visiting or staying for a short time.
How do I know if I can even apply for a Green Card?
Figuring out if you qualify is the first big step. There are many ways to become eligible, like having a family member who’s a U.S. citizen or permanent resident, being offered a job by a U.S. company, or seeking safety in the U.S. You’ll need to check the specific rules for each way.
What’s the difference between applying from inside the U.S. versus from another country?
If you’re already in the U.S. legally, you might be able to ‘adjust your status’ without leaving. If you’re outside the U.S., you’ll likely go through ‘consular processing’ at a U.S. embassy or consulate in your home country.
What happens after I submit my application?
After you apply, you’ll usually have to go to a place called USCIS for a ‘biometrics’ appointment, where they take your fingerprints and photo. Later on, you’ll attend an interview with a USCIS officer to talk about your application.
What are the main things I need to do once I have a Green Card?
Having a Green Card is awesome, but it comes with rules. You have to keep living in the U.S., tell USCIS if you move, and renew your card every 10 years. It’s also important not to stay outside the U.S. for too long, as that could affect your status.
How long does it usually take to get a Green Card?
That’s a tricky question because it really depends! Things like how you’re applying, where you’re from, and how busy USCIS is can all change how long it takes. Some people get theirs in months, while for others, it can take a year or even longer.
Getting a visa de trabajo Estados Unidos can feel like a big hurdle, right? It’s the first step for many wanting to work and build a life here. The whole process can seem pretty complicated, with lots of different visas and rules to figure out. But don’t worry, we’re going to break it down. This article will give you a clearer picture of the work visa options available and what you generally need to do to apply. Think of it as your roadmap to understanding the US work visa system.
Key Takeaways
There are two main types of US work visas: temporary, for short-term jobs, and permanent, which can lead to a Green Card.
Most temporary work visas require a job offer from a US employer who will sponsor your application.
Permanent work visas often involve a more complex process, including labor certification to prove no qualified US workers are available.
Common temporary visas include the H-1B for specialty occupations and the L-1 for company transfers.
Seeking help from an immigration attorney can simplify the application process and increase your chances of approval.
Understanding United States Work Visas
What Constitutes a Work Visa?
A work visa is basically your ticket to legally work in the United States. It’s a document that allows foreign nationals to come to the U.S. for employment. Think of it as permission granted by the U.S. government for a specific job or type of work. Without the right visa, working in the U.S. isn’t allowed and can lead to some serious trouble.
Temporary Versus Permanent Work Visas
When we talk about work visas, they generally fall into two big buckets: temporary and permanent. Temporary work visas are for jobs that have an end date. Maybe you’re coming for a specific project, seasonal work, or a short-term assignment. These visas have limits on how long you can stay and work. Permanent work visas, on the other hand, are for those looking for a long-term career and a path to living in the U.S. permanently. These are often called employment-based green cards.
Here’s a quick look at the main differences:
Feature
Temporary Work Visa
Permanent Work Visa (Green Card)
Purpose
Short-term employment, specific projects, seasonal work
Long-term career, permanent residency
Duration
Limited, specific period
Indefinite, pathway to citizenship
Sponsorship
Usually required from a U.S. employer
Often requires employer sponsorship and labor cert.
Complexity
Generally less complex than permanent options
More intricate, often longer processing times
The Role of Sponsorship in Obtaining a Visa
For most work visas, especially temporary ones, you can’t just apply on your own. You’ll almost always need a U.S. employer to sponsor you. This means the company has to officially offer you a job and then go through a process with the U.S. government to get permission to hire you. They essentially vouch for you and the need for your skills. This sponsorship is a really big deal because it shows the government that there’s a legitimate job waiting for you and that hiring a foreign worker is necessary.
The U.S. immigration system has many different paths, and each one has its own set of rules and requirements. It’s easy to get confused, so understanding the basics of what each visa type is for is the first step before you even think about filling out forms.
Some common temporary visas include the H-1B for specialized jobs and the L-1 for moving within a company. For permanent options, you might hear about EB-1, EB-2, or EB-3 visas, which are based on your skills, education, or investment. The EB-5 visa is specifically for investors looking to put money into U.S. businesses and create jobs.
Navigating Temporary Work Visa Pathways
So, you’ve got a job offer from a U.S. company and they’re willing to sponsor you for a temporary work visa. That’s a big step! But what exactly does that involve? It’s not just about showing up with your resume; there are specific procedures to follow.
Securing a Job Offer and Employer Petition
First things first, you absolutely need that job offer. This isn’t just any offer, though. The U.S. employer has to formally petition for you with the U.S. government. They’re essentially telling the government, "We need this person for this specific job, and we couldn’t find a qualified U.S. worker to do it." This petition is a pretty big deal and requires the employer to provide a lot of details about the position and why they need to hire someone from abroad. It’s a commitment on their part, so make sure you’re both on the same page.
Gathering Essential Documentation for Application
Once the employer’s petition is underway, it’s your turn to get your paperwork in order. This is where things can get a bit detailed. You’ll need your passport, of course, but also the employment contract, proof of your qualifications (like degrees or certifications), and any other documents specific to the visa category you’re applying for. Think of it like building a case – every document supports your eligibility.
Here’s a general list of what you might need:
Valid Passport (with at least six months of validity beyond your intended stay)
Job Offer Letter and Employment Contract
Proof of Educational Qualifications (diplomas, transcripts)
Professional Licenses or Certifications (if applicable)
Previous U.S. Visas or Immigration Documents (if any)
Birth Certificate
Photos (meeting specific U.S. visa photo requirements)
The Visa Interview and Application Processing
After you’ve submitted your application and all your documents, the next step is usually an interview at the U.S. embassy or consulate in your home country. This is your chance to talk to a consular officer and answer their questions about your job, your intentions, and your background. Be prepared to explain why you want to work in the U.S. and how your skills fit the job. They want to make sure you’re a genuine applicant with a legitimate job offer.
The entire process, from the employer’s petition to your interview, can take time. It’s wise to start well in advance of your desired start date. Patience and thoroughness are key here.
After the interview, you’ll wait for a decision. Processing times can vary a lot depending on the visa type and where you’re applying from. If everything goes well, you’ll get your visa and can start planning your move!
Exploring Permanent Work Visa Options
So, you’re thinking about staying in the U.S. for the long haul? That’s where permanent work visas, often called employment-based green cards, come into play. These aren’t just for a temporary job; they’re a path to living and working in the United States indefinitely. It’s a bit more involved than the temporary routes, but totally doable if you’ve got the right qualifications and a U.S. employer willing to back you.
The PERM Labor Certification Process
Before you can even think about getting a permanent work visa, your potential employer usually has to go through something called PERM labor certification. Basically, they need to prove to the Department of Labor that hiring you won’t negatively affect American workers. This means they have to show they tried to find a qualified U.S. citizen or permanent resident for the job and couldn’t find anyone suitable. It involves a bunch of recruitment steps, like advertising the job opening. It sounds like a lot, and honestly, it can be, but it’s a necessary hurdle.
Job Posting: The employer advertises the position to see if any U.S. workers apply.
Application Submission: If no qualified U.S. workers are found, the employer submits Form ETA 9089 to the Department of Labor.
Certification: The DOL reviews the application. If everything checks out, they issue a labor certification.
This certification is a big deal. It’s the government’s way of saying, ‘Okay, we agree you really need this foreign worker because no one else is available or qualified.’ It’s a key step that shows a genuine need for your skills in the U.S. workforce.
Employment-Based First and Second Preference Visas
Once you have that PERM certification (or sometimes, if your work is so important it’s deemed in the national interest), you might qualify for an EB-1 or EB-2 visa. The EB-1 is for folks with extraordinary abilities, top-notch researchers, or managers/executives transferring within a company. It’s often the quickest way to a green card if you fit the bill. The EB-2 is for those with advanced degrees or exceptional skills. These categories are generally preferred due to potentially faster processing times compared to other employment-based options.
Investor and Other Permanent Work Visa Categories
There are other ways to get a permanent work visa too. The EB-5 visa, for instance, is for investors. If you’re willing to invest a significant amount of money, typically $900,000 or more, into a new U.S. business and create at least 10 jobs for American workers, this could be an option for you. It’s a different kind of pathway, focused on economic contribution rather than specific job skills. There are also categories for other workers, like the EB-3, which is for skilled workers, professionals, and other types of laborers, though it often involves longer wait times. It’s worth looking into all the employment-based visa options to see what might fit your situation best.
Key Work Visa Categories Explained
So, you’re looking into working in the United States, huh? It can seem like a maze with all the different visa types. Let’s break down some of the most common ones you’ll hear about. It’s not just about getting in the door; it’s about finding the right door for your situation.
Specialty Occupations: The H-1B Visa
This is a big one, especially for folks in fields like tech, engineering, or finance. The H-1B visa is for what they call ‘specialty occupations.’ Basically, it means the job needs someone with specific, advanced knowledge, and usually, a bachelor’s degree or higher is required. Your potential employer has to file a petition for you, and there’s a cap on how many of these visas are issued each year, so it can get competitive. It’s a popular choice for many professionals looking to work in the US.
Intra-Company Transfers: The L-1 Visa
Got a job with a big international company? The L-1 visa might be your ticket. This one is for employees who are transferring from an office in another country to a related office here in the States. You’ve got to have worked for the company abroad for at least a year in a managerial, executive, or specialized knowledge role. It’s a good way for companies to move their own people around.
Extraordinary Ability: The O-1 Visa
This visa is for folks who are really, really good at what they do. We’re talking about people with extraordinary abilities in fields like science, arts, education, business, or athletics. It’s not just about being good; you need to show proof of national or international acclaim. Think Nobel Prize winners, Olympic athletes, or famous artists. It’s a tougher one to get, but it’s there for the absolute top talent.
The process for any work visa can be complex, and each category has its own set of rules and requirements. It’s not a one-size-fits-all situation, and what works for one person might not work for another. Taking the time to understand the specifics of each visa type is really important before you start applying.
Here’s a quick look at some other categories you might encounter:
H-2B Visa: For temporary, non-agricultural seasonal workers. Think hospitality or landscaping jobs that have peak seasons.
E-2 Visa: For investors from countries that have a treaty with the U.S. You invest a good chunk of money into a U.S. business and work in it.
TN Visa: This is specifically for Canadian and Mexican citizens working in certain professional fields, thanks to NAFTA.
Essential Steps in the Application Process
Okay, so you’ve figured out which work visa you need and hopefully have a job offer lined up. Now comes the part where you actually have to, you know, apply. It’s not exactly a walk in the park, but if you break it down, it’s manageable. Just be ready to fill out some forms and gather a bunch of papers.
Completing the Application Forms Accurately
This is where you can’t afford to mess up. Seriously. Whether it’s the main visa application or a supporting form like the I-129 for the employer, every box needs to be filled out correctly. Double-check names, dates, addresses – everything. An error here could mean your whole application gets sent back or, worse, denied. It’s like trying to assemble furniture without the instructions; you might get there, but it’s going to be a headache.
Paying Required Visa Fees
Yep, there’s a cost involved. The fees can add up, and they’re usually non-refundable, so make sure you’re ready to pay before you submit. The amounts can change, so always check the official U.S. Citizenship and Immigration Services (USCIS) website for the latest figures. They often have different fees for different visa types and sometimes even for processing.
Fee Type
Approximate Cost (USD)
Petition Filing Fee
$450 – $700
Application Processing Fee
$200 – $300
Other Potential Fees
Varies
Note: These are estimates and can change. Always verify on the USCIS website.
Attending the Visa Interview
If your visa type requires an interview, this is your chance to make a good impression. Be on time, dress professionally, and bring all the documents they asked for, plus a few extra copies just in case. The consular officer wants to confirm the information on your application and make sure you’re genuinely coming to the U.S. for the work you stated. Be honest and straightforward with your answers. They’ve seen it all, so trying to be someone you’re not probably won’t work.
Remember, the goal of the interview is for the officer to verify your identity and the legitimacy of your work visa application. Having all your paperwork in order and being able to clearly explain your situation will go a long way. Don’t be surprised if they ask about your job duties, your employer, and your plans in the U.S.
It’s a lot to keep track of, for sure. But taking it step-by-step and being thorough makes a big difference. If you’re feeling overwhelmed, don’t hesitate to get some help.
After Visa Approval: Next Steps
So, you got the good news – your work visa is approved! That’s a huge relief, right? But hold on, there are still a few things to sort out before you pack your bags. It’s not quite time to celebrate just yet, but you’re definitely on the right track.
Receiving Your Approved Visa
Once your visa is officially approved, you’ll typically receive it in your passport. This is the official document that allows you to travel to the United States for work. Make sure to check it carefully for any errors. It’s also a good idea to keep a copy of your approval notice, like the I-797, handy. This is your proof that everything went through correctly. If you’re outside the U.S., you’ll need to plan for the visa stamping process at a U.S. embassy or consulate. This usually involves scheduling an appointment and attending an interview to get the physical visa placed in your passport. It’s a pretty straightforward step, but it’s important to get it done.
Understanding Visa Conditions and Duration
Your approved visa isn’t a free pass to do whatever you want. Each work visa comes with specific rules and limitations. For instance, an H-1B visa is usually granted for a set period, often three years, with the possibility of extensions. You need to know exactly how long your visa is valid and what you can and cannot do while you’re in the U.S. on that visa. Are you allowed to change employers? Can you bring your family? These are all questions you should have answers to. Violating these conditions can lead to serious problems, including deportation, so pay close attention to the details. It’s wise to review the documentation that came with your approval notice or consult with your sponsoring employer for clarification.
Preparing for Your Move to the United States
With the visa in hand and a clear understanding of its terms, it’s time for the practical stuff. This means figuring out housing, transportation, and setting up bank accounts. If your employer is providing relocation assistance, now’s the time to coordinate with them. You’ll also want to make sure you have all your personal documents in order, like birth certificates and educational records, just in case they’re needed. Don’t forget to notify relevant parties of your upcoming move, such as your current landlord or utility companies. Planning ahead will make your transition much smoother and less stressful. Remember, getting the visa is a major hurdle, but settling into your new life in the U.S. is the next big adventure.
The entire process, from initial application to visa approval, can be lengthy and complex. Staying organized and informed at every stage is key to a successful outcome. Don’t hesitate to seek clarification from your employer or immigration professionals if anything is unclear.
Here’s a quick checklist to help you prepare:
Confirm your visa’s start and end dates.
Arrange for accommodation in the U.S.
Understand your employment contract details.
Gather important personal and financial documents.
Plan your travel arrangements.
Research healthcare options available to you.
Getting your work visa approved is a significant achievement, and it opens up a new chapter. By carefully following these post-approval steps, you can ensure a smooth transition into your new role and life in the United States. For more detailed information on specific visa types and their requirements, you can refer to resources like the USCIS website.
Seeking Professional Guidance for Your Visa de Trabajo Estados Unidos
Look, figuring out the whole US work visa thing can feel like trying to assemble IKEA furniture without the instructions. It’s complicated, and honestly, one wrong move can really mess things up, maybe even get your application tossed out. That’s where getting some help from the pros really makes a difference.
The Value of Immigration Attorneys
Think of an immigration attorney as your guide through this maze. They know the ins and outs of the system, the different visa types, and what paperwork actually needs to be in that giant folder you’re supposed to submit. They can spot potential problems before they become big headaches. It’s not just about filling out forms; it’s about making sure you’re applying for the right visa and that everything is presented in a way that makes sense to the immigration folks.
Ensuring Compliance and Accuracy in Applications
This is a big one. The US government has a lot of rules, and they expect you to follow them to the letter. Attorneys are trained to catch those little details that could cause delays or outright denials. They’ll double-check everything, from your job offer details to your personal history, to make sure it all lines up perfectly. It’s about avoiding costly mistakes that could set you back months, or even years.
Accessing Support and Staying Informed
Beyond just the application itself, lawyers can help you understand what happens after you get your visa. What are the rules you need to follow? How long is it valid? What if your situation changes? They can also keep you in the loop about any changes in immigration law that might affect you. It’s good to have someone in your corner who’s watching out for you and knows what’s going on.
Here’s a quick look at what an attorney can do for you:
Eligibility Check: They’ll figure out if you even qualify for a work visa before you spend time and money on an application.
Paperwork Power: They handle the heavy lifting of preparing and reviewing all the documents, making sure nothing is missed.
Application Filing: They know which boxes to tick and which forms to use, so your application goes to the right place.
Problem Solving: If something goes wrong, like a denial, they can help you figure out what to do next, like filing an appeal.
The immigration process is constantly changing, and keeping up with all the updates can be a full-time job in itself. Relying on outdated information or trying to guess what the government wants is a risky strategy. Professional guidance helps ensure you’re working with the most current requirements and best practices.
Getting professional help might seem like an extra expense, but when you consider the potential cost of a denied application or a long delay, it often pays for itself. It’s about peace of mind and a much smoother journey to working in the United States.
Wrapping Up Your Work Visa Journey
So, getting a work visa for the US is definitely a process, right? It’s not exactly a walk in the park, and there are a lot of details to keep track of. But honestly, with a bit of patience and by making sure you have all your paperwork in order, it’s totally doable. Don’t be afraid to ask for help if you need it – whether that’s from an immigration lawyer or just double-checking official government sites. Staying informed is key. Keep pushing forward, and you’ll be one step closer to those opportunities in the United States.
Frequently Asked Questions
What is a work visa and why do I need one?
A work visa is like a special permission slip that lets you come to the United States to work. If you’re not a U.S. citizen or a permanent resident, you’ll usually need one of these visas to legally hold a job here. It’s the first step to working in the U.S. and can lead to bigger opportunities.
What’s the difference between a temporary and a permanent work visa?
Think of it like this: a temporary work visa is for a specific job for a limited time, kind of like a short-term contract. A permanent work visa, on the other hand, is a pathway to living and working in the U.S. for good, eventually leading to a Green Card and possibly citizenship.
Do I need a U.S. employer to sponsor me for a work visa?
For most work visas, yes, you absolutely do. The U.S. employer who wants to hire you needs to show that they need your specific skills and that they couldn’t find a qualified American worker for the job. They’ll handle a lot of the paperwork to make this happen.
What are some common types of temporary work visas?
Some popular temporary work visas include the H-1B for skilled professionals in fields like tech or engineering, the L-1 for people transferring within a company to a U.S. office, and the O-1 for individuals with extraordinary talents or achievements. There are also visas for seasonal agricultural and non-agricultural workers (H-2A and H-2B).
How long does the work visa application process usually take?
The time it takes can vary a lot, but it’s often a lengthy process. It can take several months, or even over a year, from when your employer starts the process to when you might get your visa. This depends on the type of visa, how busy the government offices are, and if all your paperwork is correct.
What happens after my work visa is approved?
Once your visa is approved, you’ll receive it and can then travel to the United States. It’s super important to understand the rules and how long your visa is valid. You’ll need to follow these conditions carefully to keep your legal status while you’re working here.
Thinking about becoming a U.S. citizen? It’s a big step, and the process can seem a little daunting at first. We’re putting together a guide for 2026 to break down all the details about applying for citizenship, or what’s often called ‘ciudadania americana requisitos’. We’ll cover who qualifies, what papers you need, and what to expect along the way. Let’s get started on understanding the path to becoming a U.S. citizen.
Key Takeaways
To apply for U.S. citizenship, you generally need to be a lawful permanent resident for a set number of years, meet age requirements, and show you have a good character.
There are special paths to citizenship for spouses of U.S. citizens, those serving in the military, and children of U.S. citizens.
You’ll need to gather specific documents, including your Green Card, and possibly marriage or divorce papers, and be ready to explain any past legal issues.
Most applicants must pass an English and a civics test, with different versions of the civics test depending on when you apply.
The application involves filing Form N-400, attending an interview, and finally taking an Oath of Allegiance if approved.
General Eligibility Requirements for Ciudadania Americana Requisitos
So, you’re thinking about becoming a U.S. citizen? That’s a big step, and there are definitely some boxes you need to tick before you can even start the application process. It’s not just about wanting it; you have to meet specific criteria set by the government. Think of it like getting ready for a big trip – you need the right documents, enough time, and to generally be in good standing.
Lawful Permanent Resident Status
This is usually the main path for most people wanting U.S. citizenship. You need to have been a lawful permanent resident, meaning you have a Green Card, for a certain amount of time. For most folks, this means holding that Green Card for at least five years. There are some exceptions, like if you’re married to a U.S. citizen, where the time requirement might be shorter (three years). It’s important to have maintained this status without any major issues.
Age and Residency Duration Requirements
First off, you generally need to be at least 18 years old when you file your application. Beyond that, there are two key residency rules to keep in mind:
Continuous Residence: You need to show that you’ve lived in the U.S. consistently for at least five years right before you apply. This doesn’t mean you can never leave the country, but long trips away can break this continuity. We’ll get into the specifics of that later.
Physical Presence: It’s not enough to just be a resident on paper; you actually have to have been physically present in the U.S. for a minimum of 30 months out of those five years. Again, this is something we’ll break down further.
Local Residency: You also need to have lived in the state or USCIS district where you’re applying for at least three months before filing.
Good Moral Character Standards
This one can feel a bit fuzzy, but it’s really important. USCIS wants to see that you’ve been a person of good moral character for at least the five years leading up to your application. What does that mean in practice? Well, it generally means you haven’t committed certain crimes, you’ve paid your taxes, and you’ve generally followed the laws. It’s about showing you’re a responsible member of society and that you respect the U.S. legal system.
Basically, USCIS looks at your history to make sure you’re someone who respects the laws and values of the United States. It’s not just about the last few years; they can look back further for certain issues.
Meeting these general requirements is the first big hurdle. If you tick these boxes, you’re on your way to the next stages of the naturalization process.
Special Categories for Naturalization Applicants
While most folks apply for citizenship after being a green card holder for five years, there are a few other paths that might work for you. It’s not a one-size-fits-all situation, and USCIS knows that. Depending on your circumstances, you might qualify under different rules, sometimes even with a shorter waiting period.
Spouses of U.S. Citizens
If you’re married to a U.S. citizen, things can move a bit faster. You might be able to apply for citizenship after only three years as a lawful permanent resident, provided you’ve been living with your U.S. citizen spouse during that entire time. This is a pretty common route for people whose partners are already citizens. It’s important to show that your marriage is genuine and that you’ve maintained a continuous residence in the U.S. for those three years. You’ll still need to meet the other general requirements, like good moral character and passing the English and civics tests, but the residency clock is shorter.
Service Members and Veterans
For those who have served in the U.S. military, there are special provisions. This can significantly speed up the naturalization process, and in some cases, the residency and physical presence requirements are waived entirely. If you’re currently serving on active duty or have served honorably in the U.S. armed forces, you should definitely look into these benefits. The specific requirements can depend on when and how long you served, and whether your service was during a period of hostilities. It’s a way for the U.S. to honor those who have served the country.
Children of U.S. Citizens
This category is a bit different. If you were born outside the U.S. and have a U.S. citizen parent, you might already be a citizen. If not, and you’re under 18, you might be eligible to automatically acquire citizenship through your parent. This is called "acquisition of citizenship." If you’re already a lawful permanent resident and your U.S. citizen parent files the application for you, you might be able to get citizenship through a process called "derivation." The rules here can be complex and depend on when your parents became citizens and other factors. It’s worth looking into if this applies to your family situation.
Required Documentation to Submit with Form N-400
Alright, so you’re getting ready to file your N-400, the application for U.S. citizenship. That’s a big step! Now, let’s talk about what you actually need to send in with it. It can seem like a lot, but breaking it down makes it way more manageable. Having all your documents in order beforehand is key to a smoother process.
Permanent Resident Card (Green Card)
This one’s pretty straightforward. You’ll need to include a copy of your Permanent Resident Card, often called a Green Card. Make sure you copy both the front and the back of the card. It’s your proof that you’ve been lawfully admitted as a permanent resident.
Marriage and Divorce Certificates
This part depends on your personal situation. If you’re currently married, you’ll need to provide a copy of your current marriage certificate. If you’ve been married before, you’ll also need to show proof that those previous marriages ended. This could be a divorce decree, an annulment decree, or a death certificate for your former spouse. USCIS needs to see that any prior marriages were legally terminated before you got married to your current spouse, if applicable.
Documentation for Criminal History or Exemptions
This is where things can get a bit more detailed. If you’ve ever had any run-ins with the law, anywhere in the world, you’ll need to provide documentation. This isn’t meant to scare you, but they need a clear picture.
Here’s a general idea of what might be needed:
Arrests without charges filed: If you were arrested or detained but no charges were ever brought against you, you’ll need an arrest report and an official statement from the police or court saying no charges were filed.
Convictions or alternative sentences: If you were convicted of a crime, or if you participated in programs like diversion, deferred prosecution, or rehabilitation programs (even for things like drug treatment or community service), you’ll need the sentencing records. You’ll also need proof that you successfully completed whatever program you were in.
Arrests with charges filed: If charges were filed after an arrest, you’ll need to gather all the related documents. This includes arrest reports, charging documents, court dispositions, sentencing reports, and anything else that shows the outcome. It’s also a good idea to include any extra information you think might help explain the situation.
If any of your documents are not in English, you absolutely must include a full English translation. The translator needs to provide a statement saying the translation is accurate and that they are qualified to do the translation. Don’t skip this step!
Also, if you’re applying for an exemption from the English or civics tests because of a disability, you’ll need to submit Form N-648, Medical Certification for Disability Exceptions. Make sure it’s filled out completely by your doctor.
English Language and Civics Test Requirements
Once you submit your N-400, you’ll need to show that you can read, write, and speak basic English, and that you know some facts about the United States government and history. Most applicants have to pass both the English and civics tests at their interview. But depending on your age or a qualifying medical condition, you might be eligible for an exception or accommodation.
2008 vs. 2025 Civics Test Versions
The civics test asks about U.S. history, government, and symbols. Which version you take depends on when you filed your N-400:
Filing Date for Form N-400
Civics Test Version
Before October 20, 2025
2008 Civics Test (100 questions)
On or after October 20, 2025
2025 Civics Test (128 questions)
The 2008 test asks you up to 10 questions. You need to answer 6 correctly to pass.
The 2025 test is a bit longer, and the questions have changed. There are new study materials, so check what’s covered before your interview.
English Proficiency Expectations
USCIS wants to see that you can:
Read a simple sentence in English.
Write a simple sentence in English.
Understand and answer questions, spoken in English, related to your application or background.
You won’t need to write an essay or answer complicated grammar problems. The interviewer will usually ask you to read and write a few quick sentences—nothing stressful, but you should still practice just to be sure.
Exemptions and Accommodations for Testing
You could be excused from all or parts of the language and civics tests if you meet specific conditions:
Age/Residency Exemptions: If you’re 50 or older and have lived in the U.S. as a permanent resident for 20 years, or 55 and lived here for 15, you don’t have to take the English test. You still take the civics test, but can do it in your native language.
Medical Disability Exception: If you have a disability that prevents you from learning or showing English or civics knowledge, you may submit Form N-648 for an exemption.
Accommodations: If you need support, like a sign language interpreter or extra time, you can request this with your application. For more information about accommodations for the civics test with medical exceptions, see the English language exceptions guidelines.
Preparing for the test is important, even if you think your English is good. Studying ahead of time can make you feel more relaxed and ready when you walk into your interview.
Continuous Residence and Physical Presence Guidelines
Okay, so you’re looking into becoming a U.S. citizen. One of the big things USCIS wants to see is that you’ve been living here consistently and actually present in the country for a good chunk of time before you apply. It’s not just about having that green card; it’s about putting down roots, so to speak.
Physical Presence in the United States
This is pretty straightforward: it means you were physically inside the U.S. borders. For most people applying based on being a lawful permanent resident for five years, you need to show you’ve been physically present in the U.S. for at least 30 months out of those five years. It sounds like a lot, but it’s a key part of the process. Think of it as proving you’ve made the U.S. your home.
Trips Abroad and Maintaining Residency
Now, what about vacations or work trips? This is where it gets a little tricky. If you take a trip outside the U.S. that lasts for six months or more, it can disrupt your continuous residence. If a trip is a year or longer, it’s generally considered an abandonment of your U.S. residence. Trips between six months and one year are a gray area, and you’ll need to provide solid evidence that you didn’t abandon your U.S. residence. This could include things like:
Rent or mortgage statements
Pay stubs showing U.S. employment
Bank or credit card statements with regular U.S. activity
Car registration and insurance documents
Your passport with U.S. entry and exit stamps
IRS tax transcripts
Basically, you need to show you kept your ties to the U.S. strong even while you were away. It’s all about demonstrating that your primary home remained here.
Special Evidence for Spouses of U.S. Citizens
If you’re applying based on marriage to a U.S. citizen, the rules for continuous residence and physical presence are a bit different, usually requiring only three years instead of five. However, the same principles about trips abroad still apply. If you had any trips lasting more than six months but less than a year during that three-year period, you’ll need to provide that same kind of documentation to prove you maintained your residence in the U.S. It’s important to have all your ducks in a row, especially when it comes to proving your continuous residence in the United States.
It’s really important to keep good records of your travel. Missing even one key document can make things more complicated down the line. Think about keeping a travel log or a folder with all your important receipts and statements related to your U.S. residency.
Application Filing Steps and Legal Assistance
So, you’ve gone through all the requirements and gathered your documents. The next big step is actually submitting your application. It might seem a little daunting, but USCIS has made the process more straightforward over the years. The key is to be organized and follow the instructions carefully.
Creating a USCIS Online Account
One of the most convenient ways to apply is online. You’ll need to set up a USCIS online account. Think of it as your personal portal for all things related to your citizenship application. Once you have an account, you can fill out and submit Form N-400, the application for naturalization, right there. It also lets you pay the filing fee, track your case status, and get updates directly. If you’re requesting a fee waiver or reduced fee, though, you’ll have to file a paper application instead.
Completing and Submitting Form N-400
Form N-400, Application for Naturalization, is the main document you’ll be working with. You can file it either online through your USCIS account or by mail. If you mail it, make sure you’re using the most current version of the form, which you can usually find on the USCIS website. Double-check that all pages are from the same edition. Missing pages or an outdated form can lead to your application being rejected.
Here’s a quick look at filing options:
Online Filing: Requires a USCIS online account. Allows for easy fee payment, case tracking, and notifications.
Paper Filing: Necessary if you’re requesting a fee waiver or reduced fee. You’ll need to mail the completed form along with supporting documents.
Remember to sign your form! An unsigned application will be rejected, no matter how complete it is otherwise.
Seeking Legal Support for Your Application
While many people successfully file on their own, there are times when getting help is a good idea. If your case is complex, perhaps due to a criminal record, long absences from the U.S., or if you have questions about eligibility, consulting with an immigration attorney or an accredited representative can be really beneficial. They can help you prepare your Form N-400 correctly and make sure you have all the necessary evidence. They can also represent you throughout the process. If you choose to have a representative, they’ll need to submit Form G-28, Notice of Entry of Appearance as Attorney or Accredited Representative, with your application.
Filing your application is a significant step. Take your time, read everything thoroughly, and don’t hesitate to seek assistance if you feel unsure about any part of the process. Accuracy and completeness are key to a smooth experience.
Understanding the Naturalization Oath and Final Steps
The journey to U.S. citizenship ends with a few big moments, and most people say it’s both nerve-wracking and exciting. Taking the Oath of Allegiance is the final requirement before becoming an American citizen. Here’s what you need to know about the whole process and what comes after.
Taking the Oath of Allegiance
Once your Form N-400 is approved by USCIS, you’ll be scheduled for a naturalization ceremony to recite the Oath of Allegiance. This step makes your status official. The ceremony might be the same day as your interview or scheduled for another date.
You’ll receive a notice with your ceremony date, time, and place.
Bring your Green Card (Permanent Resident Card), the oath ceremony notice, and any other documents USCIS asks for.
At the ceremony, you’ll turn in your Green Card and get a Certificate of Naturalization.
This is the moment when you formally accept all the rights and the responsibilities that come with being a U.S. citizen.
For more details on what happens after approval, including the scheduling of your ceremony, check the USCIS guidance on Oath ceremonies.
Final Verification and Documentation Review
Before the actual oath ceremony, officials will do a last check of your paperwork:
You’ll review your application with a USCIS official to make sure nothing has changed since your interview.
If any new issues have come up (like travel abroad or run-ins with law enforcement), you’ll have to share them before taking the oath.
Make sure all your personal details on your Certificate of Naturalization are correct—things like your name, date of birth, and country of former nationality.
Required to Bring
Purpose
Green Card
To be surrendered on becoming a citizen
Oath Ceremony Notice
Proof of summons and entry
Other Requested Documents
As specified in your ceremony notice
What to Expect After Approval
Once you’ve taken the oath, you can:
Apply for a U.S. passport—this proves your citizenship and allows you to travel internationally.
Register to vote in federal, state, and local elections.
Update your Social Security record to reflect your new status.
Sponsor certain relatives for their own path to citizenship.
Remember, your journey as a citizen starts with the oath, but what happens afterwards is just as important. Use your new status responsibly and take full advantage of your new rights and opportunities!
Wrapping Up Your Journey to Citizenship
So, that’s the rundown on becoming a U.S. citizen in 2026. It’s definitely a process with a lot of steps, and it can seem like a lot at first. But remember, you’ve got resources like USCIS and even organizations like MIRC that can help guide you along the way. Whether you’re looking at the five-year green card rule, being married to a citizen, or serving in the military, there are different paths. Just take it one step at a time, get your paperwork in order, and prepare for that interview and test. It’s a big step, but it’s totally doable.
Frequently Asked Questions
Who can apply to become a U.S. citizen?
Generally, you can apply to become a U.S. citizen if you’ve been a green card holder for at least five years. There are also special rules for people married to U.S. citizens, those serving in the U.S. military, and children of U.S. citizens. You also need to be at least 18 years old and show you have good character.
What is the N-400 form?
The N-400 form is the official application for naturalization, which is the process of becoming a U.S. citizen. You’ll need to fill it out completely and truthfully with information about yourself, your family, and your history in the U.S.
Do I have to take a test to become a citizen?
Yes, most people need to pass two tests: an English test to show you can read, write, and speak English, and a civics test about U.S. history and government. However, some people might be excused from these tests based on their age or certain disabilities.
When do I need to take the 2025 civics test?
If you submit your N-400 application on or after October 20, 2025, you will take the newer 2025 civics test. If you applied before that date, you’ll take the 2008 version.
What does ‘continuous residence’ mean?
‘Continuous residence’ means you’ve lived in the U.S. for a certain amount of time without leaving for long periods. If you travel outside the U.S. for more than six months, it might affect your application, so it’s important to understand these rules.
How long does the citizenship process usually take?
The time it takes can vary a lot depending on where you live and how busy USCIS is. After you submit your N-400, you can check the USCIS website for estimated processing times for your specific case.
If you’re a DACA recipient, keeping your protection from deportation and your work permit valid is super important. As 2025 rolls around, it’s good to know what’s up with renewing DACA, the timing, and how to skip those common application mistakes. This guide is here to break down what you need to know about your DACA renovacion 2025.
Key Takeaways
Renewing DACA in 2025 requires careful attention to eligibility, including continuous residence and a clean record. Make sure you meet all the updated criteria.
The renewal process involves specific forms (I-821D, I-765, I-765WS) and a $495 fee. Double-check everything is filled out correctly.
Submit your renewal application between 150 and 120 days before your current DACA expires to avoid gaps in your status and work authorization.
After submitting, you’ll likely have a biometrics appointment. Keep track of your application status online.
While DACA renewal is key, explore other immigration options like family or employment-based pathways for more permanent solutions, especially given the program’s uncertain future.
Understanding DACA Renewal Eligibility in 2025
So, you’re looking to renew your DACA status for 2025? It’s a big deal, and understanding who qualifies is the first step. The program, while still active for renewals, has seen some shifts, so it’s good to get a clear picture of where things stand. Keeping your DACA status current is key to maintaining your work authorization and protection from deportation.
Who Qualifies for DACA Renewal
If you’ve been approved for DACA before and your status hasn’t been taken away, you’re likely eligible to renew. The main thing is that you haven’t had any major legal issues since your last approval. It’s also important that you haven’t left the U.S. without getting special permission, known as advance parole, after August 15, 2012. Basically, if you’ve been approved before and kept your nose clean and stayed put, you’re probably good to go for renewal.
Key Eligibility Criteria Updates
While the core requirements haven’t changed drastically, there’s a bit more emphasis on certain areas. USCIS wants to see that you’ve been continuously living in the U.S. since your last approval. They also look at your educational background – being currently enrolled in school, having a GED, or a high school diploma still counts. For those with past convictions, the rules about felonies, significant misdemeanors, or multiple misdemeanors remain strict. It’s important to have a clean record to show you’re not a threat to public safety or national security. Staying informed about these details is part of renewing your DACA status.
Maintaining Continuous Residence and Good Moral Character
This is where things can get a little detailed. Continuous residence means you haven’t been absent from the U.S. for extended periods, especially without advance parole. Think of it as maintaining your home base here. Good moral character is also a big one. This generally means avoiding serious criminal activity. It’s not just about avoiding jail time; it’s about demonstrating a pattern of lawfulness. If you’ve had any run-ins with the law, even minor ones, it’s worth looking into how they might affect your renewal. Sometimes, even a single misdemeanor can cause issues, so being upfront and honest about your history is always the best approach.
It’s really important to be honest on your application. If you’re unsure about any part of your history, like past arrests or travel, it’s better to get advice before you submit anything. Trying to hide something can cause way bigger problems down the road than just being upfront about it.
Here’s a quick look at what USCIS generally considers:
Continuous Residence: You must show you’ve lived in the U.S. without significant breaks since your last DACA approval.
Physical Presence: You need to have been physically present in the U.S. on specific dates, like June 15, 2012.
Educational/Work Status: You should be currently in school, have graduated, have a GED, or be honorably discharged from the U.S. armed forces.
No Serious Criminal Convictions: This includes avoiding felony offenses, significant misdemeanors, or multiple misdemeanor convictions.
No Threat to Security: You must not pose a threat to national security or public safety.
Navigating the DACA Renewal Application Process
Completing Required Forms
Getting your DACA renewal forms right is super important. You’ll need to fill out a few key ones. First up is Form I-821D, which is for the Consideration of Deferred Action for Childhood Arrivals. Then there’s Form I-765, the Application for Employment Authorization, because you’ll want to keep that work permit active. You’ll also need to complete the I-765 Worksheet, which asks about your financial situation and why you need to work. It’s really easy to make a mistake on these, so take your time. Read everything carefully, and if you’re not sure about something, it’s better to ask for help than to guess. Missing information or a signature can really slow things down, or worse.
Gathering Essential Supporting Documents
While you don’t always need to send in a ton of new documents for a renewal, it’s smart to have things ready. You’ll definitely need a copy of your previous DACA approval notice, if you have it. A valid government-issued ID is also a must. If anything has changed since your last application, like a new address or any legal issues, you’ll need to provide documentation for that. Sometimes USCIS might ask for more proof of continuous residence or your current educational enrollment or employment. It’s a good idea to keep a file with all your immigration-related papers so you can easily grab what you need.
Understanding the Filing Fee and Payment Options
Okay, let’s talk about the money part. As of 2025, the total fee for a DACA renewal is $495. This fee covers both the deferred action request and the employment authorization. It’s a significant amount, so plan ahead. You can pay with a personal check, money order, cashier’s check, or a credit card using Form G-1450, Authorization for Credit Card Transactions. Make sure your payment is made out correctly to the U.S. Department of Homeland Security. If paying the full amount all at once is tough, look into community organizations or non-profits that might offer financial assistance or payment plans. Don’t let the fee stop you from renewing if you’re eligible.
It’s really important to double-check all the forms and documents before you send them in. A small error could lead to your application being rejected or delayed, which is the last thing anyone needs when dealing with DACA renewal. Taking an extra few minutes to review everything can save you a lot of headaches down the road.
Here’s a quick rundown of what you’ll generally need:
Form I-821D: Application for Deferred Action for Childhood Arrivals.
Form I-765: Application for Employment Authorization.
Form I-765WS: Worksheet for the I-765.
Copy of previous DACA approval notice (Form I-797).
Copy of government-issued photo ID.
Filing Fee: $495 (check or money order payable to U.S. Department of Homeland Security, or Form G-1450 for credit card payment).
New photos (if requested by USCIS, usually for the work permit).
Any new supporting documents (e.g., proof of address, school enrollment, employment records, or documents related to any legal issues).
Timelines and Submission for DACA Renewals
Staying on top of your DACA renewal timeline is key to never having to worry about losing your work permit or status. Here’s how to get the timing and submission right for 2025:
Recommended Renewal Application Window
For the best chance at uninterrupted coverage, send in your DACA renewal application 120 to 150 days before your current status expires. This range isn’t random—it gives plenty of time for your paperwork to get processed, fingerprints taken care of, and any government delays. If you send it in earlier than 150 days, you could end up with overlapping periods of coverage—so your renewal might not last the full two years. Wait too long (less than 120 days), and you risk a gap while you wait for your next approval. In other words, timing really matters:
Submission Timing
Risk of Coverage Gap
Renewal Period Impact
150+ days early
Low
Might be shorter
120–150 days early
Very low
Ideal; full 2 years
<120 days early
Medium-High
Possible gap
Importance of Timely Submission
Here’s what you need to remember:
Submitting past the recommended window means your current DACA and work authorization could expire before USCIS decides on your case.
If your DACA expired under a year ago, you can still try to renew.
For more than a year since expiration, you’d have to start over like a first-time applicant—more paperwork, more waiting.
Always keep tabs on your current expiration date, so it never sneaks up on you.
Without DACA renewal, your work authorization and protection from deportation temporarily disappear until a new approval comes in. That waiting game isn’t fun.
Where to Submit Your Application Packet
Find the right address for your packet on the official USCIS instructions. Typically, renewals go to a lockbox facility—not your local office! Here’s what to check off before mailing:
All required forms (I-821D, I-765, I-765WS) are complete, signed, and dated.
Your supporting documents (previous approval notices, EAD card, etc.) are included.
The $495 fee is enclosed (no fee waivers for DACA).
Use a delivery service that lets you track your package.
Processing times usually take 2–4 months for most people, but it’s smart to use a DACA processing estimate to keep your expectations realistic in 2025.
Keep copies of everything for your own records, and make sure you keep up with USCIS updates about your application status. When in doubt, submit early and double-check every page before sending it off.
After Submission: What to Expect
So, you’ve sent in your DACA renewal application. That’s a big step! Now comes the waiting game, and it’s good to know what’s happening behind the scenes. USCIS will first check if your application is complete. If everything looks good, you’ll get a receipt notice in the mail. This is your confirmation that they’ve received it and are starting to process it.
Biometrics Appointment Procedures
For many renewal applicants, the next step involves a trip to an Application Support Center (ASC) for biometrics. This means getting your fingerprints scanned and a photo taken. USCIS will send you a separate appointment notice with the date, time, and location. It’s really important to show up for this appointment. Missing it can cause significant delays or even lead to your application being denied. Make sure you bring the appointment notice and a valid photo ID with you.
Tracking Your Application Status
Wondering how your case is progressing? You can keep an eye on it. If you provided your email or phone number and filled out Form G-1145, you might get text or email updates when USCIS accepts your application. You can also check your status online through the USCIS website. You’ll need your receipt number, which is on that notice they send you after accepting your application. It’s not always super detailed, but it gives you a general idea of where things stand.
Potential Delays and How to Address Them
Sometimes, things take longer than expected. USCIS reviews each case individually, and if they need more information, they’ll send you a Request for Evidence (RFE). It’s important to respond to these requests promptly and completely. If you’re facing unusual delays or have specific concerns about your case, it might be a good idea to consult with an immigration attorney or a reputable accredited representative. They can help you understand your options and how to best move forward.
Waiting for USCIS can be stressful, but staying organized and informed is key. Keep copies of everything you submit and all notices you receive. Knowing the general steps involved can make the process feel a little less daunting.
Addressing Common DACA Renewal Challenges
Sometimes, the DACA renewal process can feel like a maze, and it’s easy to get tripped up. Let’s talk about some of the bumps you might hit and how to get around them.
Avoiding Mistakes on Your Application
This is a big one. A simple mistake can cause delays or even lead to your application being rejected. It’s not like forgetting to dot an ‘i’ on a school paper; this has real consequences. You really want to make sure everything is filled out correctly.
Here are some common slip-ups to watch out for:
Missing Information: Double-check that every box is filled in. If a question doesn’t apply to you, make sure you indicate that clearly, rather than leaving it blank.
Incorrect Form Versions: Always use the most current forms available on the USCIS website. Older versions can lead to immediate issues.
Missing Signatures: This sounds basic, but people forget! Make sure you and any co-applicants (if applicable) sign and date all required sections.
Not Including Required Fees: Ensure you’re paying the correct amount. If you’re unsure, check the USCIS website or consult with a trusted resource.
It’s always a good idea to have someone else look over your application before you send it in. A fresh pair of eyes can catch things you might have missed.
What If Your DACA Has Expired?
Okay, so maybe you missed the renewal window, or there was a delay, and your DACA status has lapsed. It’s a stressful situation, no doubt about it. The most important thing is not to panic. You can still apply for renewal, but you’ll need to be extra careful. You might also have a gap in your work authorization, which can be tough. It’s really important to understand that your protection from deportation also lapses when your DACA expires.
Immediate Action: As soon as you realize your DACA has expired, start the renewal process immediately. The sooner you file, the better.
Work Authorization: You cannot legally work in the U.S. once your Employment Authorization Document (EAD) expires. This can create financial hardship.
Legal Counsel: If your DACA has expired, it’s highly recommended to seek advice from an immigration attorney or a reputable non-profit organization. They can help you understand your specific situation and the best way forward.
Seeking Assistance for Complex Cases
Sometimes, your situation might be a bit more complicated. Maybe you have a minor legal issue in your past, or perhaps you’ve had travel outside the U.S. that needs careful explanation. Trying to figure these things out on your own can be overwhelming. Don’t hesitate to reach out for help.
Non-profit Organizations: Many organizations offer free or low-cost assistance with DACA renewals. They often hold workshops and can help you prepare your application.
Immigration Attorneys: For more complex issues, like past arrests or complicated travel history, consulting with an immigration lawyer is your best bet. They have the knowledge to guide you through tricky legal waters.
Community Groups: Local community groups can sometimes point you toward resources or provide support networks. Connecting with others who have gone through similar experiences can be really helpful.
Remember, you don’t have to go through this alone. There are people and organizations ready to help you navigate these challenges and keep your DACA status active. Processing times can be lengthy, so starting early is always the best strategy for DACA renewal.
Exploring Pathways Beyond DACA Renewal
If you’re a DACA recipient looking ahead, you might be wondering what other options exist for staying in the U.S. permanently. While DACA provides protection from deportation and work authorization, it does not create a direct path to permanent residency or citizenship. Because of that, exploring every possible route is smart, especially with legal changes still in the air.
Understanding Immigration Alternatives
There are several ways to obtain legal status beyond DACA, each with its own set of rules and hoops to jump through. Some common options include:
Family-based immigration: Marrying a U.S. citizen or having immediate relatives (like parents or adult children) who are citizens can sometimes open doors to lawful permanent residency. This almost always requires a legal entry to the U.S.—something not all DACA recipients have.
Employment-based visas: Rare, but possible for those with unique skills, advanced degrees, or employer sponsorship. Permanent residency through work usually means going through labor certification and showing you’re eligible under current rules.
Humanitarian relief: Victims of crimes or abuse (like the U visa, T visa, or VAWA protection), children eligible for Special Immigrant Juvenile Status (SIJS), or those fearing return (asylum, in some cases) might be able to apply for other forms of relief.
It’s common to feel stuck at first, but there’s often at least one pathway worth looking at with the right legal help.
Family-Based Sponsorship Options
If you have close family who are U.S. citizens or lawful permanent residents, they might be able to sponsor you. Here’s a quick look at eligibility:
Relationship
Possible Pathway
Key Notes
Spouse (U.S. citizen or resident)
Marriage-based green card
Lawful entry usually required
Parent (U.S. citizen, if under 21)
Immediate relative
Can adjust status if lawfully admitted
Sibling (U.S. citizen, 21+)
Family preference
Long wait times, lawful entry needed
You must show a bona fide relationship.
Criminal or immigration history may impact eligibility.
Even with sponsorship, not all DACA recipients qualify due to entry or other bars.
Employment and Humanitarian Relief Pathways
Work and humanitarian routes are more challenging, but not impossible. Here are some:
U visa: For victims of certain crimes who help law enforcement.
T visa: Available for human trafficking survivors.
VAWA: Provides a self-petition route for those abused by a U.S. citizen or legal resident spouse or family member.
SIJS: For minors who have been abused, abandoned, or neglected by parents.
Asylum: For those fearing serious harm in their home country, although this is a tough path and fewer qualify.
Steps for pursuing these options:
Talk to a reputable immigration attorney about your history.
Gather all personal documentation and immigration records.
Track every deadline and application requirement diligently.
Don’t try to handle more complex cases alone—professional help can make the difference between a setback and a new start.
DACA’s future is still uncertain. Exploring other routes gives you a backup plan and, sometimes, the chance for a permanent life in the U.S. No matter your situation, it’s worth checking your options thoroughly and early.
The Evolving Landscape of DACA in 2025
Current Legal Rulings and Their Impact
The DACA program in 2025 is still very much in flux, largely due to ongoing legal battles. A significant development came from the Fifth Circuit Court of Appeals. This ruling declared parts of the Biden Administration’s updated DACA rule unlawful. For those already in the program, this means current recipients can generally keep their status, but there are some serious catches. Work authorization, for instance, has faced new restrictions, and getting a driver’s license might be harder depending on where you live. It’s not just a Texas thing either; these rulings have a ripple effect nationwide. While the core protection against deportation is still there for now, the uncertainty around work permits is a big deal for people’s jobs and finances.
Future Outlook for the DACA Program
Honestly, the future of DACA is still up in the air. The courts are still hashing things out, and what happens next isn’t totally clear. There’s always the hope that Congress might step in with new legislation, like a version of the DREAM Act, to offer a more permanent solution. But until that happens, we’re kind of in a holding pattern. USCIS is doing its best to manage renewals under the current legal constraints, but policy changes can happen, and they can impact how applications are reviewed. It’s a lot to keep track of, for sure.
Staying Informed on Policy Changes
Because things can change pretty quickly with DACA, it’s super important to stay in the loop. Relying on official sources and qualified immigration attorneys is the best way to go. Don’t just trust random social media posts or outdated information. Keeping up with policy updates means you can renew your application on time and avoid any unnecessary problems. It also helps you think about other immigration options if they become available or necessary for your situation. Basically, being informed is your best defense.
Renew early: Aim to submit your renewal application between 120 and 150 days before your current DACA expires.
Verify information: Always double-check details on official USCIS websites or with your legal counsel.
Explore alternatives: If possible, look into other immigration pathways that might be a better long-term fit.
The legal status of DACA continues to be a subject of court decisions, creating an environment of uncertainty for recipients. Staying informed and acting proactively is key to maintaining protections and planning for the future.
Wrapping Up Your DACA Renewal
So, renewing your DACA status in 2025 might seem like a lot, but taking it step-by-step makes it manageable. Remember to get your forms in early, double-check everything for accuracy, and keep good records of your submission. The program’s future is still a bit up in the air with ongoing legal stuff, so staying informed and prepared is really the best approach. If things feel too complicated, don’t hesitate to reach out to immigration legal experts for help. They can guide you through the process and make sure you don’t miss any important details.
Frequently Asked Questions
Who can renew their DACA status in 2025?
If you’ve had DACA approved before and it hasn’t been taken away, you can likely renew it. You need to have been approved for DACA previously, not have left the U.S. without special permission (Advance Parole) since August 15, 2012, lived here without interruption since your last DACA approval, and not have serious criminal convictions. It’s always best to check the latest rules or talk to an immigration expert.
When should I submit my DACA renewal application?
It’s a good idea to send in your renewal papers about 150 to 120 days before your current DACA protection runs out. This gives USCIS enough time to process it and helps make sure you don’t have a gap in your work permit or protection from deportation.
What forms do I need to renew DACA?
You’ll need to fill out a few main forms: Form I-821D, which is for DACA itself; Form I-765, which is for your work permit; and the I-765 Worksheet, which helps explain your need for a work permit. Make sure to fill them out completely and accurately.
How much does it cost to renew DACA?
The total fee for renewing your DACA application and getting your work permit is $495. Unfortunately, there aren’t any fee waivers available for DACA renewals, so you’ll need to plan for this cost.
What happens after I submit my DACA renewal application?
After USCIS gets your application, they will likely schedule you for a biometrics appointment where they’ll take your fingerprints and photo. You’ll need to attend this. You can also track your application’s progress online through the USCIS website.
What if my DACA has already expired?
If your DACA expired less than a year ago, you can still apply for renewal. However, if it’s been expired for more than a year, you’ll need to apply as if you were a new applicant, which means more paperwork. It’s highly recommended to speak with an immigration lawyer in these situations to make sure you do everything correctly.
Thinking about applying for asylum in California? It’s a big step, and honestly, it can feel pretty overwhelming trying to figure it all out. This guide is here to break down the process, from understanding if you even qualify for asilo politico California to what happens after you get approved. We’ll try to make it as clear as possible, so you know what to expect.
Key Takeaways
To qualify for asylum, you generally need to show you’ve been harmed or have a real fear of harm in your home country because of your race, religion, nationality, political opinion, or membership in a particular social group.
There are two main ways to apply: affirmatively with USCIS if you don’t have an immigration court case, or defensively if you do have a court case.
Gathering all your documents and understanding any fees or waivers is a big part of preparing your application. It’s often best to get legal help for this.
Having a lawyer can make a huge difference in your case, helping you understand the process and present your claim effectively. Look for legal aid or experienced immigration attorneys.
Winning asylum offers protection from deportation and allows you to live and work in the U.S., with pathways to permanent residency and eventually citizenship.
Understanding Asylum Eligibility in California
So, you’re thinking about applying for asylum here in California. That’s a big step, and it’s totally understandable to want to know if you even qualify. It’s not just about being unhappy with your home country; there are specific reasons the U.S. government looks at. Basically, you need to show that you’ve been harmed or have a good reason to fear harm in your home country because of who you are or what you believe.
What Constitutes Asylum Eligibility?
To be eligible for asylum, you generally need to be physically present in the United States when you apply. It’s also a big deal that you apply within one year of arriving here, unless there’s a really good reason for the delay, like a big change in your situation or some extraordinary circumstances. You can’t have applied for asylum before and been denied, and you generally can’t have certain criminal convictions. The U.S. government also won’t grant asylum if you were ordered deported previously, unless there are new developments in your case. It’s a complex set of rules, and sometimes exceptions exist, especially if you have temporary status like parole or TPS.
Grounds for Asylum Claims
Asylum is granted based on five specific grounds: race, religion, nationality, membership in a particular social group, or political opinion. This means you have to prove that your government either caused the harm you experienced or is unable to protect you from it. It’s not enough to just fear general violence; the fear has to be tied to one of these protected categories. You also need to show that you wouldn’t be safe if you tried to relocate within your own country. The core idea is that you’re seeking protection because your home country can’t or won’t provide it due to persecution.
Key Characteristics of Asylum Seekers
People seeking asylum come from all walks of life, but they share a common thread: a well-founded fear of persecution. This fear isn’t just a passing worry; it’s a serious concern based on past experiences or a strong likelihood of future harm. They are individuals who have often exhausted other options and are looking for safety and a chance to rebuild their lives. Many are fleeing violence, political instability, or severe discrimination. It’s important to remember that asylum seekers are not just statistics; they are individuals with stories and hopes for a better future.
Applying for asylum can be a long and challenging road. It requires careful attention to detail and a clear presentation of your case. Gathering all the necessary documents and understanding the timelines is super important. Don’t hesitate to seek help if you need it.
Here’s a quick look at the main reasons someone might qualify:
Race: Persecution based on your racial background.
Religion: Facing harm because of your religious beliefs or practices.
Nationality: Being targeted due to your citizenship or ethnic origin.
Membership in a Particular Social Group: This is a bit broader and can include groups based on gender, sexual orientation, or other shared characteristics that make you a target.
Political Opinion: Being persecuted for your political views or activities.
If you’re unsure about your eligibility or how to start the process, looking into resources like the USCIS asylum page can be a good first step.
Navigating the Asylum Application Process
So, you’ve decided to seek asylum here in California. That’s a big step, and understanding how the application process actually works is super important. It’s not just one single path; there are a couple of main ways you can go about it, and knowing the difference can really impact your case.
Affirmative vs. Defensive Asylum Applications
Basically, there are two main routes for applying for asylum. The one you take often depends on whether you’re already involved with the immigration court system. It’s a pretty big distinction, so let’s break it down.
Affirmative Asylum: This is when you proactively apply for asylum with U.S. Citizenship and Immigration Services (USCIS). You’re essentially saying, "I want asylum, and here’s why." This is usually for people who don’t have a deportation case already happening in immigration court. You’ll file your application, and then you’ll likely have an interview with a USCIS asylum officer. It’s a non-adversarial process, meaning it’s not like a courtroom battle.
Defensive Asylum: This route is for individuals who have been placed in removal proceedings and have a case before an immigration judge. If you’re in this situation and want to apply for asylum, you’ll typically file your application with the immigration court. This process is more adversarial, as it takes place in a courtroom setting.
There are some exceptions, though. For instance, if you’re under 18, you might be able to apply affirmatively even if you have an immigration court case. It’s complicated, and that’s why getting advice is a good idea.
The choice between affirmative and defensive asylum isn’t just a technicality; it shapes how your case is heard and by whom. Understanding these differences is key to starting your application on the right foot.
Filing Your Asylum Application with USCIS
If you’re going the affirmative route, you’ll be submitting your application to USCIS. The main form you’ll need is the Form I-589, Application for Asylum and Withholding of Removal. You generally need to file this within one year of arriving in the U.S., but there are exceptions if circumstances change or if there were delays beyond your control. After you file, USCIS will review your application. If they don’t approve it and you don’t have another legal status, they might issue a Notice to Appear (NTA), which means your case will then go to an immigration judge. It’s a bit of a back-and-forth sometimes.
Submitting Your Application to Immigration Court
For those in removal proceedings, submitting your asylum application to the immigration court is the way to go. This means your case will be handled by an immigration judge. The process here is more formal, like a court hearing. You’ll need to make sure you file your application correctly with the court. If you were already in the process of applying with USCIS when you got a Notice to Appear, your case might be transferred to the immigration court. It’s important to keep track of where your application is and who has jurisdiction over it.
It’s worth noting that if your case ends up with an immigration judge, they will conduct a completely new review of your case, called a "de novo" hearing. This means the judge starts fresh and makes their own decision, independent of any initial review by USCIS.
Essential Steps for Your California Asylum Case
Okay, so you’re looking into applying for asylum here in California. It can feel like a lot, but breaking it down into steps makes it more manageable. Let’s talk about what you need to do.
Determining if You Have an Immigration Court Case
This is a big one because it changes how you apply. If you’ve been given a "Notice to Appear" (NTA) from the government, that usually means you have a case already going in immigration court. This is often called "defensive" asylum. If you haven’t received an NTA and you’re physically in the U.S., you can apply directly with U.S. Citizenship and Immigration Services (USCIS). This is known as "affirmative" asylum. It’s super important to figure this out first, as filing in the wrong place can cause delays or even problems for your case.
Sometimes, even if you have an immigration court case, you might still be able to file with USCIS. This can happen in specific situations, like if you’re under 18. It’s always best to check the exact rules or talk to someone who knows the system.
Gathering Necessary Documentation for Your Application
This is where you really build your case. You’ll need to fill out Form I-589, Application for Asylum and for Withholding of Removal. But that’s just the start. You’ll need to collect evidence that shows why you fear returning to your home country. This could include:
Personal statements: Detailed accounts of what happened to you or what you fear will happen.
Country conditions reports: Information from reputable sources (like government reports or human rights groups) about the dangers in your home country.
Evidence of persecution: Police reports, medical records, news articles, or witness statements that back up your claims.
Proof of identity and nationality: Passports, birth certificates, or national ID cards.
The more solid proof you have, the stronger your application will be. Don’t skimp on this part; it’s what the officers and judges will look at closely.
Understanding Application Fees and Waivers
Good news here: applying for asylum itself doesn’t have a filing fee with USCIS. That’s right, zero dollars to submit your Form I-589. However, if your case gets complicated and you end up in immigration court, there might be other fees down the line, though often these can be waived if you can’t afford them. If you’re applying for work authorization while your asylum case is pending, there is a fee for that, but you can request a waiver for that fee too if you meet certain income requirements. It’s always a good idea to check the latest fee schedules on the USCIS website or ask your legal representative if you’re unsure.
Legal Representation for Asylum Seekers
Applying for asylum can feel like trying to solve a really complicated puzzle, especially when you’re already dealing with so much stress. It’s a process with a lot of rules and paperwork, and honestly, it’s easy to get lost. That’s where having a lawyer or some kind of legal help really makes a difference. They know the ins and outs of the system and can help you put your best foot forward.
The Importance of Legal Counsel
Think of a lawyer as your guide through a confusing maze. They understand the specific requirements for asylum claims and can help you gather the right evidence to support your case. Without legal help, you might miss important deadlines or submit incorrect information, which could seriously hurt your chances. Having a legal professional by your side significantly increases the likelihood of a successful outcome. They can also explain complex legal terms and procedures in a way that makes sense, taking some of the burden off your shoulders.
Finding Attorneys and Legal Aid Services
Okay, so you know you need help, but where do you find it? There are a few avenues to explore. Many non-profit organizations offer free or low-cost legal services to asylum seekers. These groups often have lawyers who specialize in immigration law and are dedicated to helping people like you. You can also look for private immigration attorneys. While they usually charge fees, some may offer payment plans or work on a sliding scale based on your income. It’s a good idea to contact a few different places to see what options are available.
Here are some places to start your search:
Non-profit Immigration Legal Services: Many organizations focus on providing legal aid to immigrants and asylum seekers. A quick online search for "non-profit immigration legal services California" should give you a list.
Bar Associations: Local and state bar associations often have referral services that can connect you with immigration attorneys in your area.
Immigration Court Lists: If you have a case in immigration court, the court itself might provide lists of pro bono (free) or low-cost legal service providers.
Working Effectively With Your Lawyer
Once you find a lawyer or legal service, it’s important to build a good working relationship. Be honest and open with them about your situation and provide all the information they ask for, even if it feels difficult to share. They need the full picture to build the strongest case possible. Keep records of all your communications and any documents you give them. If you don’t understand something, ask for clarification. Remember, they are there to help you, and clear communication is key to making the process smoother.
The asylum process is complex, and immigration laws can change. It’s always best to consult with a qualified legal professional who can assess your specific situation and provide advice tailored to your needs. This information is for general guidance only and should not be considered legal advice. >
It’s also a good idea to be aware of potential scams. Unfortunately, some people try to take advantage of asylum seekers. Be wary of anyone who guarantees you will win your case or asks for large sums of money upfront without a clear contract. Always verify the credentials of any legal representative you consider working with. Reputable organizations and attorneys will be transparent about their fees and services. Checking if they are licensed is a good first step. You can usually find this information through your state’s bar association. This way, you can focus on your case without worrying about being taken advantage of.
Potential Benefits and Drawbacks of Asylum
Applying for asylum is a big decision, and it’s smart to think about what you stand to gain and what risks you might be taking. It’s not a simple yes or no answer for everyone, and the situation can get complicated pretty fast.
Benefits of a Granted Asylum Status
If your asylum claim is approved, it’s a pretty significant win. You get protection from being sent back to your home country, which is the main goal, right? Plus, you’re allowed to work legally in the U.S. This means you can get a job, start building a career, and support yourself and your family without worrying about deportation.
Protection from Deportation: You can’t be forced to return to your country of origin.
Work Authorization: You’ll be able to get a job and earn a living.
Path to Permanent Residency: After a year, you can apply for a green card, which leads to permanent residency.
Family Reunification: You can petition for certain family members to join you in the U.S.
Risks and Disadvantages of Applying
On the flip side, the application process itself has some downsides. For starters, you have to share a lot of personal information with the government. This includes details about your life, your family, and why you’re afraid to go home. If you weren’t already on the government’s radar, applying for asylum puts you on it.
Detention: Even with a pending asylum case, you could still be detained by immigration authorities.
Long Wait Times: Decisions on asylum cases can take years, meaning a long period of uncertainty.
Potential for Denial and Deportation: If your case is denied, you could face deportation.
Application Fees: There are costs associated with filing the application, though waivers might be available.
The asylum process requires you to be very open about your past and your fears. This information is shared with government agencies. While it’s necessary for your case, it’s important to be aware that you are providing a detailed account of your situation to the authorities.
Impact on Future Immigration Pathways
Winning asylum opens up several doors for your future in the U.S. As mentioned, you can eventually apply for a green card, and then later, citizenship. However, it’s worth noting that sometimes there can be pauses or changes in how applications for permanent residency or citizenship are processed, depending on your country of origin and current government policies. It’s always a good idea to stay updated on these changes.
Pathway to Green Card: After one year of being granted asylum, you can apply for lawful permanent residency.
Pathway to Citizenship: Once you have a green card for a certain period, you can apply to become a U.S. citizen.
Travel: You can apply for permission to travel outside the U.S., but there are risks involved, and you should consult with an attorney before traveling.
Life After Winning Asylum in California
So, you’ve been granted asylum in California. That’s a huge step, and honestly, a massive relief. It means you’re protected from being sent back to your home country, and you can start building a life here. But what exactly comes next? It’s not like you get a magic wand, but there are definitely some important things to know and do.
Applying for Permanent Residency
Winning asylum is fantastic, but it’s not the final destination. After you’ve been granted asylum, you can apply for a green card, which means becoming a Lawful Permanent Resident. You can file the Form I-485 application for this anytime after your asylum is approved. Keep in mind, though, USCIS won’t make a decision on your green card application for at least a year after you were granted asylum. They might also want to interview you before making a final call. It’s a big change, and it opens up a lot more doors for you here in the U.S.
Bringing Family Members to the U.S.
One of the most significant benefits of winning asylum is the ability to bring your immediate family members to join you. This usually includes your spouse and any unmarried children who were under 21 when you first applied for asylum. The great news is that they can be in the U.S. or even still in your home country, and you can still petition for them to come. It’s a way to reunite your family and build that support system you’ll need as you settle in.
Travel Permissions and Considerations
Once you have asylum status, you can ask for permission to travel outside the United States and then return. This is often done by applying for a refugee travel document. However, traveling abroad after winning asylum isn’t something to take lightly. There are risks involved, and it’s really important to understand them before you book any tickets. You’ll want to talk to an immigration expert about your specific situation and any potential issues before you plan any trips.
It’s important to stay informed about any changes in immigration policy, as these can sometimes affect asylum cases and future applications. Keeping up-to-date is key to navigating the system successfully.
Here’s a quick rundown of what winning asylum can mean:
Protection from Deportation: You can’t be forced to leave the U.S.
Work Authorization: You can legally work anywhere in the country.
Family Reunification: You can petition for your spouse and unmarried children under 21.
Path to Permanent Residency: You can apply for a green card after a year.
Organizations like the International Rescue Committee (IRC) offer support to individuals who have been displaced by conflict and persecution, which can be incredibly helpful as you adjust to life after winning asylum. Check out resources for assistance.
Special Considerations for Asylum Applicants
Applying for asylum can be a complex process, and there are a few specific situations that might affect your case. It’s not always a straightforward path, and understanding these nuances can make a big difference.
Asylum with Parole or TPS Status
If you’re already in the U.S. with Temporary Protected Status (TPS) or have been granted parole, you might still be eligible to apply for asylum. Having these statuses doesn’t automatically disqualify you. In fact, it can sometimes provide a more stable foundation while your asylum case is being processed. However, it’s important to know how these different statuses interact. For instance, if your asylum case is denied, your TPS or parole status might offer a safety net, but this isn’t always guaranteed. It’s a good idea to discuss this with an immigration lawyer to see how your current status impacts your asylum claim and vice versa.
Asylum for Unaccompanied Minors
Children who come to the U.S. without a parent or legal guardian present have special protections. The process for them is different, often involving specific legal advocates and a focus on their best interests. These cases are handled with extra care because minors are considered more vulnerable. The one-year deadline to apply for asylum might also be waived for unaccompanied minors under certain conditions. The goal is to ensure these young people have a chance to seek safety without the added burden of navigating a complicated system alone.
Avoiding Immigration Scams
Unfortunately, there are people out there who try to take advantage of asylum seekers. These scams can cost you money and, worse, harm your case. Always be wary of anyone who guarantees you will win your asylum case or asks for large sums of money upfront without a clear contract.
Here are some red flags to watch out for:
Unsolicited offers of help, especially if they seem too good to be true.
Requests for payment in cash or to unusual accounts.
Promises to speed up your case for an extra fee.
Not providing written contracts or receipts for payments.
Claiming to be a government official and demanding immediate payment or personal information.
If you’re unsure about someone offering immigration services, it’s best to seek help from reputable sources like accredited legal aid organizations or attorneys recommended by official channels. Don’t let dishonest people derail your chance at safety.
Wrapping Things Up
So, applying for political asylum in California is definitely a big step. It’s not a simple process, and honestly, things can change pretty fast with immigration laws. Because it’s so complex, getting help from a lawyer or a group that knows this stuff really well is a good idea. They can look at your specific situation and give you the best advice. Remember, this guide is here to help you understand the basics, but your case is unique. Don’t hesitate to seek out professional legal support to help you through it all.
Frequently Asked Questions
What exactly is asylum?
Asylum is a way for people who have come to the United States to get protection. If you’re afraid to go back to your home country because you’ve been hurt or fear you will be hurt, you might be able to get asylum. If you win your asylum case, the U.S. government generally can’t send you back to your country.
Who can apply for asylum?
You can apply for asylum if you are already in the United States and have a reason to fear returning to your home country. This fear must be because of your race, religion, nationality, membership in a particular social group, or your political opinions. You generally need to apply within one year of arriving in the U.S., but there are exceptions.
Can I apply for asylum if I have TPS or parole?
Yes, you can still apply for asylum even if you have Temporary Protected Status (TPS) or parole. Having asylum status means you can eventually apply for a green card, which is permanent residency, and later even U.S. citizenship. It’s usually best to apply for asylum as soon as you can.
Do I need a lawyer to apply for asylum?
While you can apply for asylum on your own, the process is very complicated. Having a lawyer or legal aid group can make a big difference. They understand the laws and can help you prepare your case correctly. You can find legal help through non-profit organizations or by searching for immigration attorneys.
What happens if my asylum case is approved?
If your asylum case is approved, you’ll be protected from being sent back to your country. You’ll be allowed to live and work in the United States. After a year, you can apply for a green card (permanent residency), and eventually, you might be able to become a U.S. citizen. You can also ask to bring your close family members to join you.
What are the risks of applying for asylum?
Applying for asylum means giving a lot of personal information to the government. If your case is denied, you could be asked to leave the United States. Also, asylum cases can take a very long time to decide, and there might be fees involved. It’s important to understand these risks before you apply.